图片压缩自动化教程,让你轻松掌握解放双手的技能!
今天逛 V2EX 看到一个 使用 squoosh-cli 批量压缩图片 的帖子,让我想起之前要把自己上传到 Github 的图片进行压缩为 Webp 后再上传到 CDN(云存储) 上,这样方便博客直接调用 Webp 格式的图片,从而提高图片的加载速度。

准备工作
- Github 账号
- 使用 Docker 自建一个 Squoosh 的服务
获取 Squoosh 压缩参数
-
使用 Docker 自建一个 Sqoosh 的服务
docker run -d --name squoosh \ --restart unless-stopped \ -p 7701:8080 \ dko0/squoosh:1.12.0 -
打开服务后的地址:IP+端口,阿斌自建的服务
-
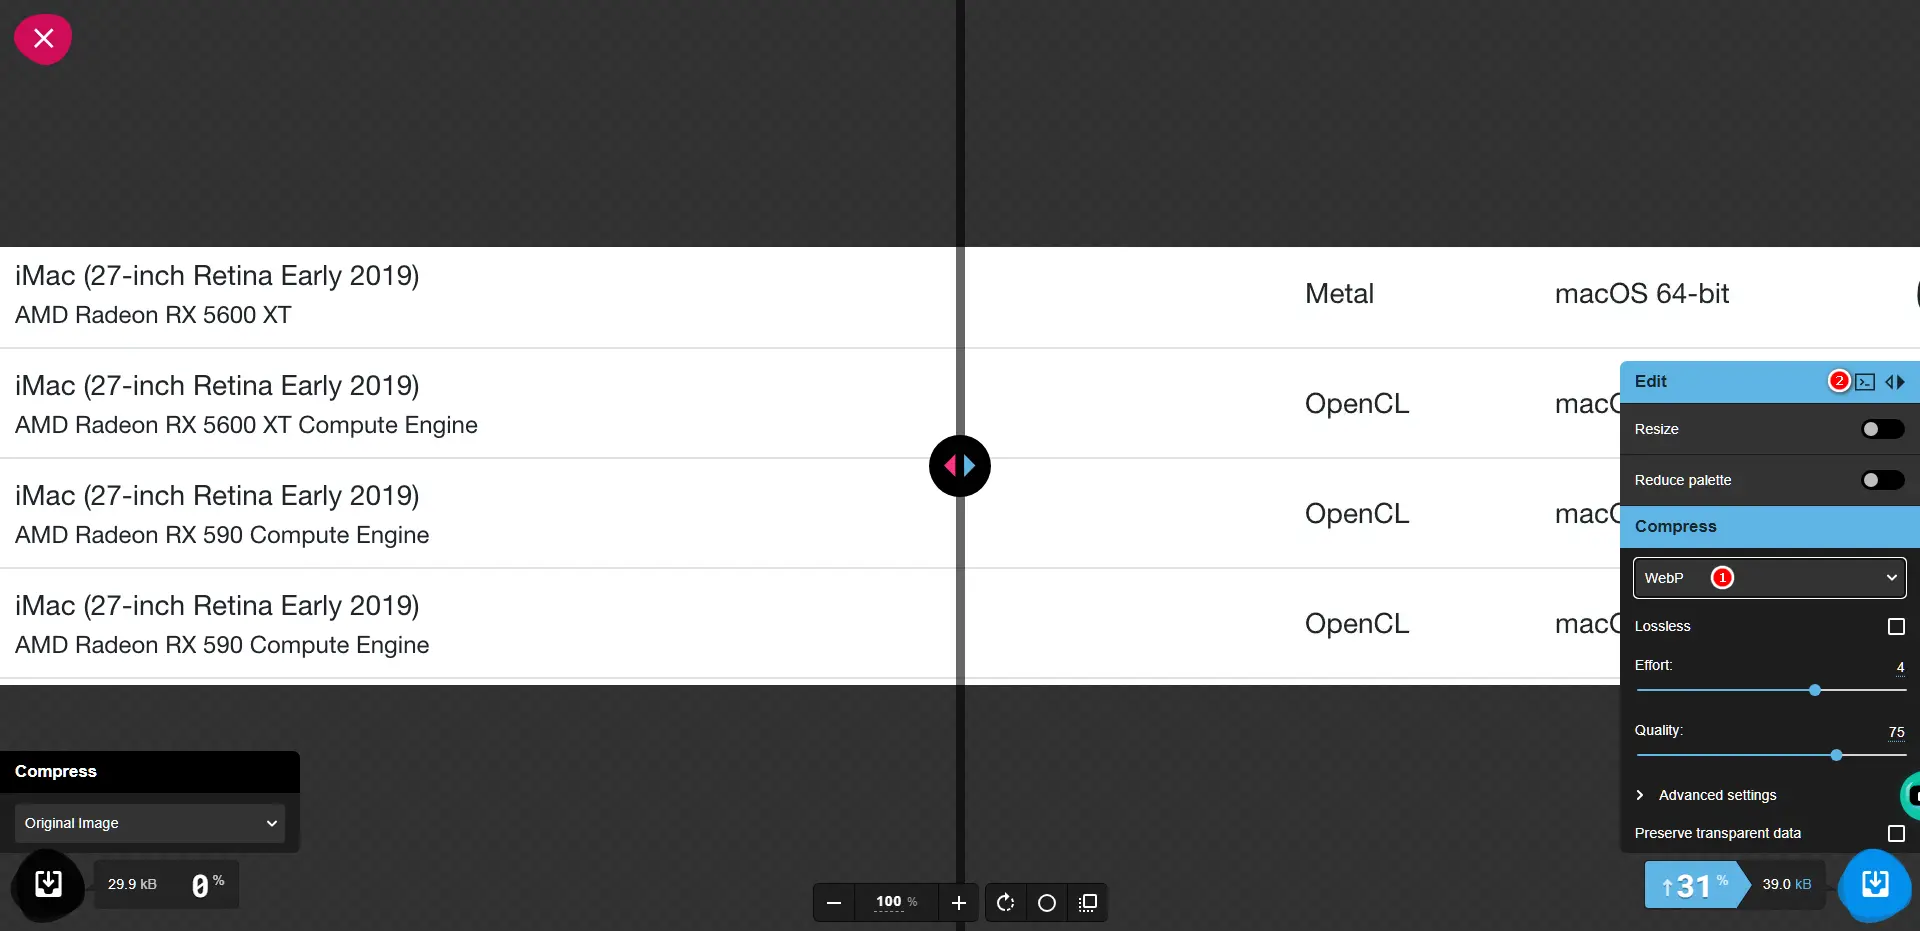
随意拖入一张图片,将格式改为
Webp(根据自己需求调整格式),复制 npx 命令(下图中2所标注的位置)
按需调整 -
复制时 Chrome 浏览器会有以下提示,表示:复制未成功
TypeError: Cannot read properties of undefined (reading 'writeText') -
按以下步骤解决第4步的问题
-
在chrome浏览器地址栏输入:
chrome://flags/ -
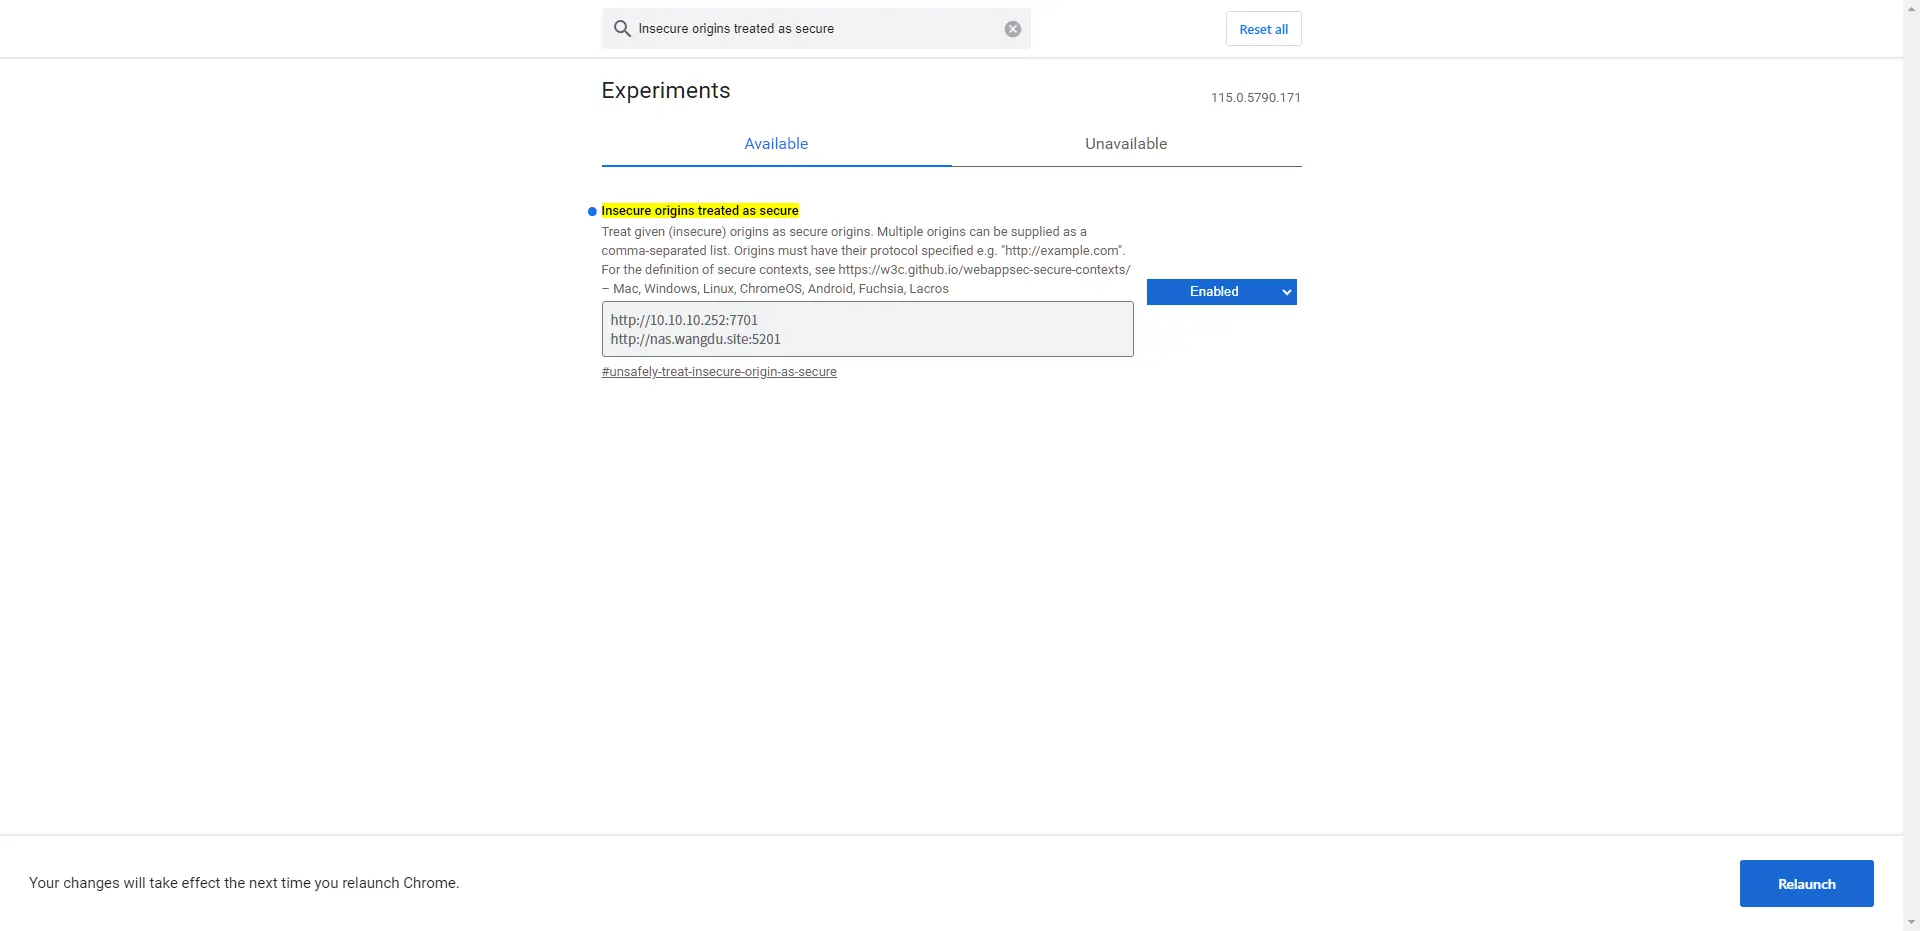
在搜索框输入:
Insecure origins treated as secure -
在输入框填入服务地址即可
-
点击底部的
Relaunch,重启浏览器来生效配置
图片版本
-
-
重新复制即可,提示:
CLI command copied to clipboard表示成功,内容如下:npx @squoosh/cli --webp '{"quality":75,"target_size":0,"target_PSNR":0,"method":4,"sns_strength":50,"filter_strength":60,"filter_sharpness":0,"filter_type":1,"partitions":0,"segments":4,"pass":1,"show_compressed":0,"preprocessing":0,"autofilter":0,"partition_limit":0,"alpha_compression":1,"alpha_filtering":1,"alpha_quality":100,"lossless":0,"exact":0,"image_hint":0,"emulate_jpeg_size":0,"thread_level":0,"low_memory":0,"near_lossless":100,"use_delta_palette":0,"use_sharp_yuv":0}'
Github Action 压缩
-
在 Github - Action 新建一个 New workflow,参考:自动化版图床保姆级搭建教程:B2/又拍云+CF+GitHub 下的
GitHub同步到Backblaze -
内容如下,替换内容里的
压缩参数、Github用户名、Github邮箱为自己的即可name: Image Conversion on: push: branches: - main jobs: build: runs-on: ubuntu-latest steps: - name: Checkout repository uses: actions/checkout@v2 - name: Set up Node.js uses: actions/setup-node@v2 with: node-version: '14' - name: Install dependencies run: npm i -g @squoosh/cli - name: Convert images to WebP run: | for file in $(find . -type f \( -name "*.jpg" -o -name "*.jpeg" -o -name "*.png" \)); do webp_file="${file%.*}.webp" if [ ! -f "$webp_file" ]; then output_dir=$(dirname "$file") # 替换下面的压缩参数 npx @squoosh/cli --webp '{"quality":75,"target_size":0,"target_PSNR":0,"method":4,"sns_strength":50,"filter_strength":60,"filter_sharpness":0,"filter_type":1,"partitions":0,"segments":4,"pass":1,"show_compressed":0,"preprocessing":0,"autofilter":0,"partition_limit":0,"alpha_compression":1,"alpha_filtering":1,"alpha_quality":100,"lossless":0,"exact":0,"image_hint":0,"emulate_jpeg_size":0,"thread_level":0,"low_memory":0,"near_lossless":100,"use_delta_palette":0,"use_sharp_yuv":0}' -d "$output_dir" "$file" fi done - name: Commit and push changes uses: EndBug/add-and-commit@v9 with: author_name: Github用户名 author_email: Github邮箱 message: Convert images to WebP -
每次往 Github 上传文件即可执行脚本,脚本做了防重复,
已经转为 Webp 的文件不会再转换。 -
之前上传 CDN 的机制为上传到仓库就同步,现在又增加一步压缩,以又拍云为例(注释的地方就是修改前的机制):
- 上传顺序:执行完压缩 - 上传CDN
name: Sync Upyun Bucket

# on:
#   push:
#     branches:
#       - main

# 修改后如下
on:
 workflow_run:
   workflows: ["Image Conversion"]
   types:
     - completed
 workflow_dispatch:
   inputs:
     unconditional-invoking:
       description: 'Upyun同步文件'
       type: boolean
       required: true
       default: true

env:
   TZ: Asia/Shanghai # 设置当前环境时区

jobs:
 deploy:
   runs-on: ubuntu-20.04
   steps:
     - uses: actions/checkout@master
     - uses: her-cat/upyun-deployer@v1.0.2
       with:
         bucket: ${{ secrets.BUCKET }}
         operator: ${{ secrets.OPERATOR }}
         password: ${{ secrets.OPERATOR_PASSWORD }}
         publish_dir: 'WP-CDN-02'
验证
在本地用 上传工具 上传到GitHub,查看Action是否运行,运行成功后查看本地是否有压缩后的文件。
- 运行成功、有文件:代表配置没问题
- 运行失败:查看报错并解决
总结
这回终于实现了 压缩 - 上传 一条龙服务了,你只要在本地上传,其余的交给自动化脚本就完事了
为啥没有删除源文件呢?存个备份。
如果觉得不错的话,留言给阿斌,阿斌会很高兴的哦!
支持博主
如果帮到你的话,帮忙点一下左侧的赞助链接或者微信公众号、小程序:文武科技社底部的广告,算是对博主的免费支持。
| 微信 | 支付宝 |
|---|---|
 |
 |
阿斌创建了一个网页用以感谢 支持我的朋友,详情请看 致谢名单
你觉得这篇文章怎么样?


大大的小蜗牛
压缩图片在用 CDN 的原生能力。腾讯云目前免费 10TB。
上传图片用的 Piclist,是 PicGo 的全面加强版。
斌仔
又拍云好像也自带转为webp,我现在用的是backblaze,没有这个功能,只能手动转换,为了省事还是自动化吧
工具不错,后面可以试用一下
obaby
这个自动化不错,不过我一般是需要压缩的时候直接用图压,本地压缩了直接wp后台上传
斌仔
这个比较适合使用云存储的,这样方便很多